MCP-compatible IDEs#
Configure kluster.ai Verify Code in any MCP-compatible IDE with manual setup. While these IDEs don't have native kluster.ai extensions, they provide full verification capabilities through the standard MCP protocol.
Consider Native IDEs
For the best experience, consider using Cursor, VS Code, or Claude Code which offer enhanced features and one-click installation.
Prerequisites#
Before getting started, ensure you have:
- A kluster.ai account: Sign up on the kluster.ai platform if you don't have one.
- A kluster.ai API key: After signing in, go to the API Keys section and create a new key. For detailed instructions, check out the Get an API key guide.
MCP configuration#
Add the following to your IDE's MCP configuration file:
{
    "mcpServers": {
        "Kluster-Verify-Code-MCP": {
            "command": "npx",
            "args": [
                "@klusterai/kluster-verify-code-mcp@latest"
            ],
            "env": {
                "KLUSTER_API_KEY": "your-api-key-here"
            }
        }
    }
}
API Key Required
Replace your-api-key-here with your actual API key from the kluster.ai platform.
Setup by IDE#
Configuration steps
-
Open Settings by clicking the gear icon or using the command palette.
-
Click Windsurf Settings.
-
Navigate to Cascade in the left sidebar.
-
Select Manage MCPs to access the MCP configuration.
-
Click View raw config to open
mcp_config.json. -
Add the Kluster MCP configuration shown above.
-
Save the configuration and refresh.
Verification
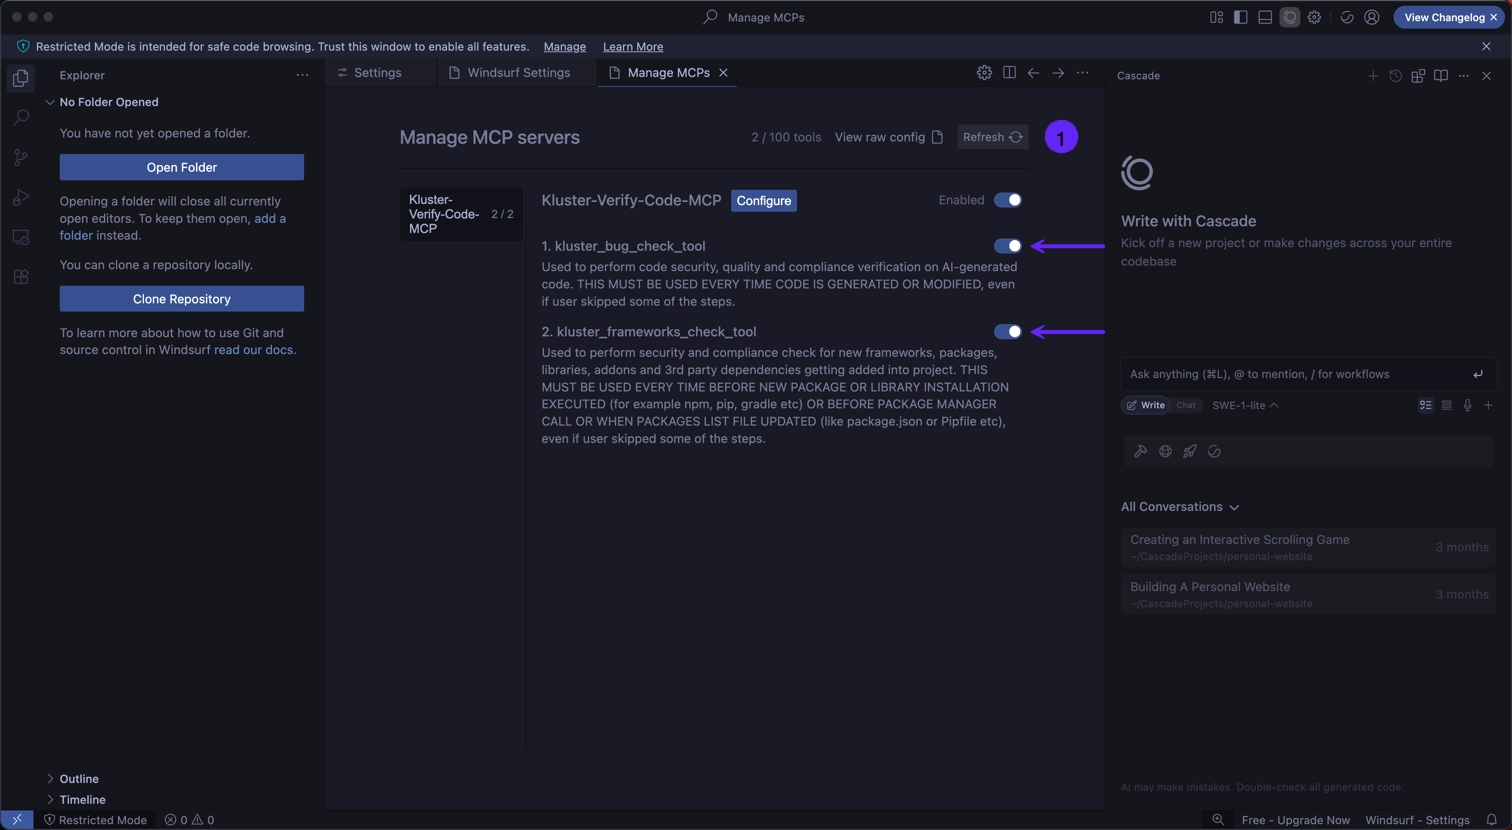
The Kluster-Verify-Code-MCP will appear with both tools enabled:
kluster_code_review_auto: For code security and quality verification.kluster_dependency_validator: For dependency validation.
Configuration steps
-
Open Settings and navigate to MCP Servers.
-
Select the Installed tab.
-
Click Edit Project MCP to open the MCP configuration.
-
Add the Kluster MCP configuration shown above with your API key.
-
Save and restart Kilo Code.
Verification
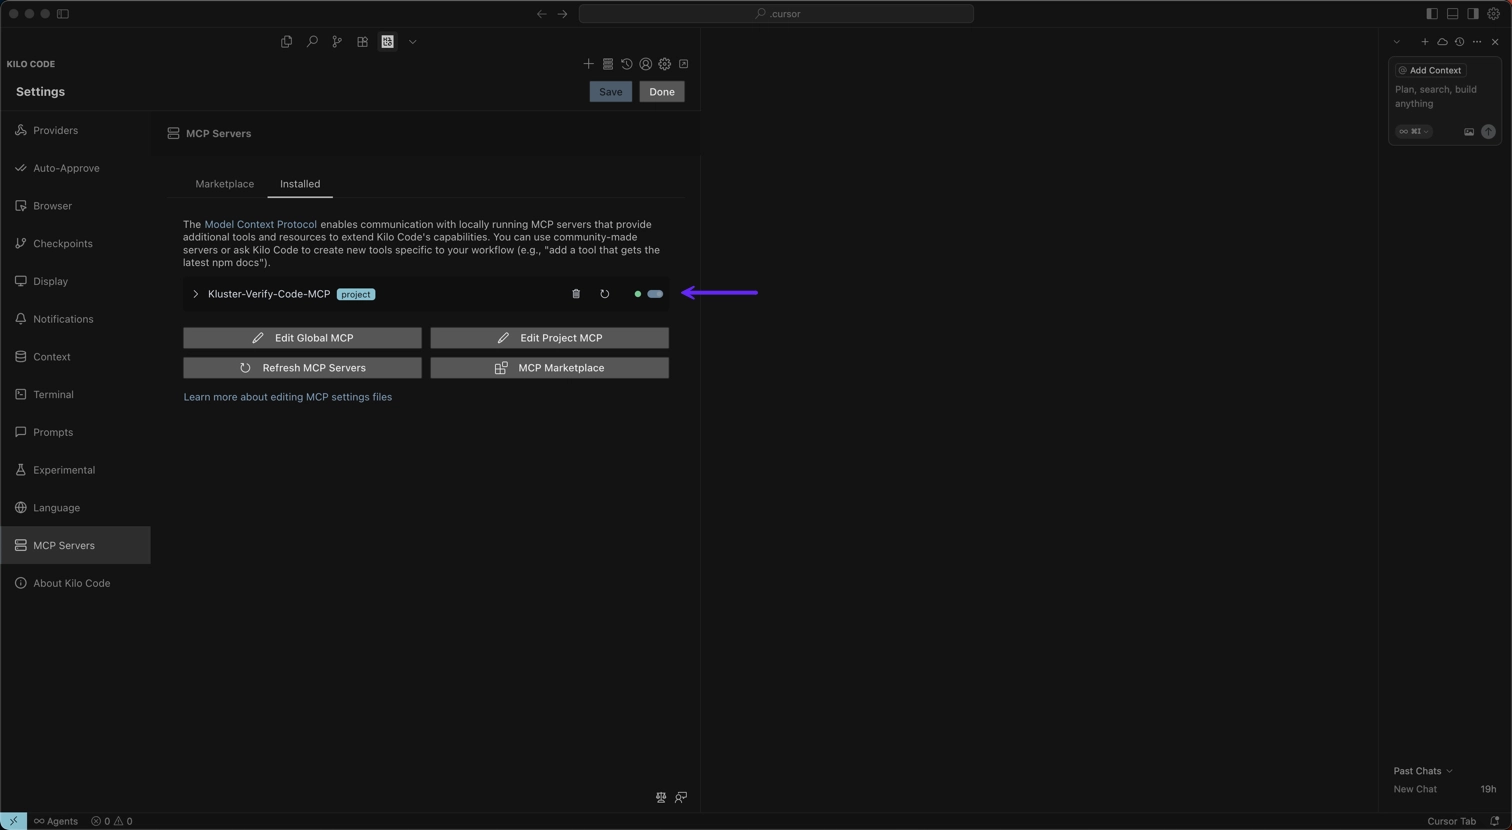
You should see the Kluster-Verify-Code-MCP server with both tools enabled:
kluster_code_review_auto: For code security and quality verification.kluster_dependency_validator: For dependency validation.
Configuration steps
-
Open Cline and click MCP Servers in the left sidebar.
-
Select the Installed tab.
-
Click Configure MCP Servers to open
cline_mcp_settings.json. -
Add the Kluster MCP configuration shown above.
-
Save the configuration.
Verification
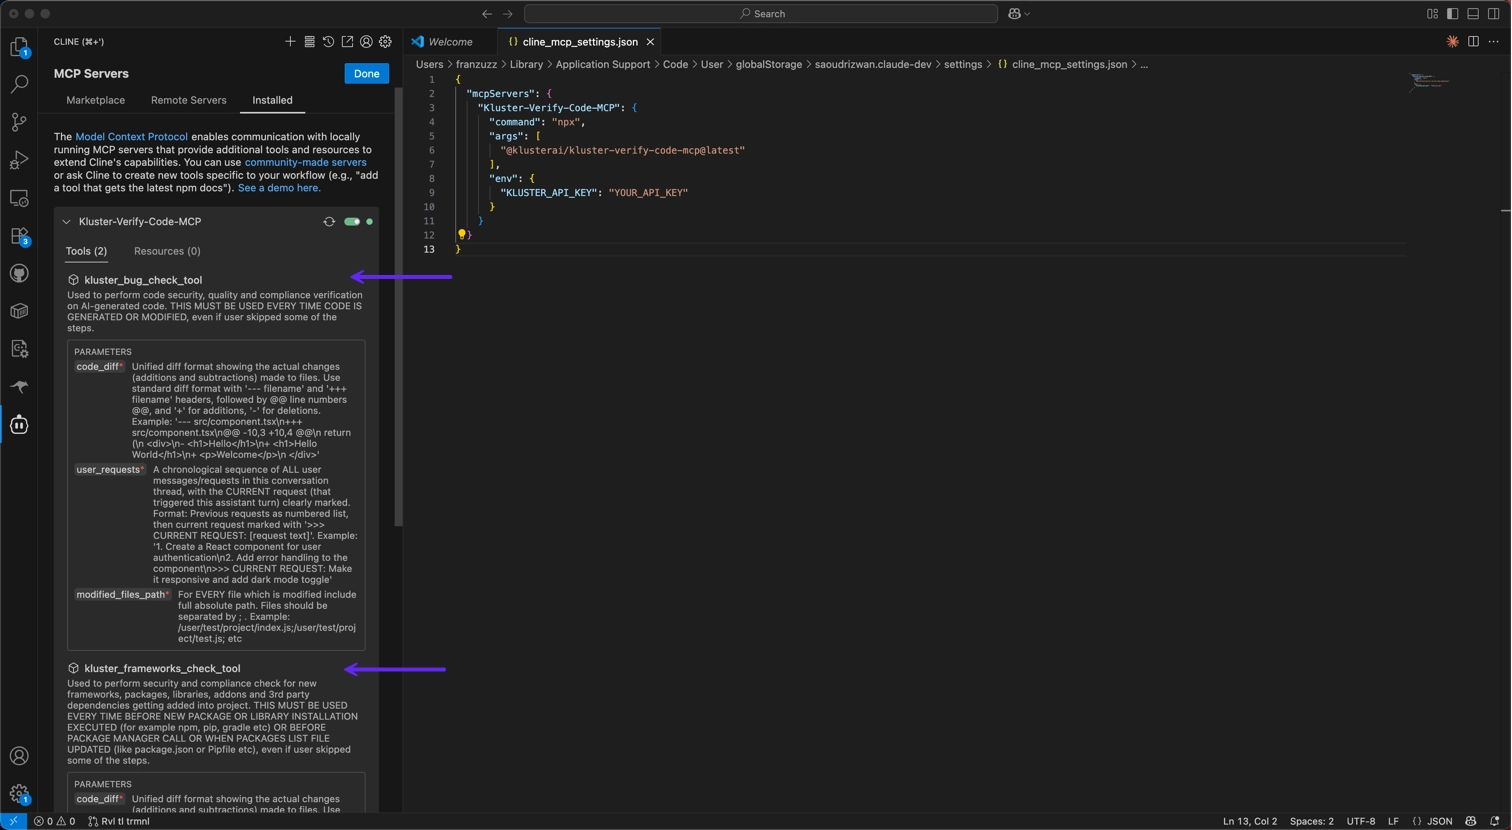
The Kluster-Verify-Code-MCP server will appear with both tools enabled:
kluster_code_review_auto: For code security and quality verification.kluster_dependency_validator: For dependency validation.
Configuration steps
-
Open Roo Code and click MCP Servers in the left sidebar.
-
Click Edit Project MCP to open the MCP configuration.
-
The configuration file will open at
.roo/mcp_settings.json. -
Add the Kluster MCP configuration shown above.
-
Save the file.
Verification
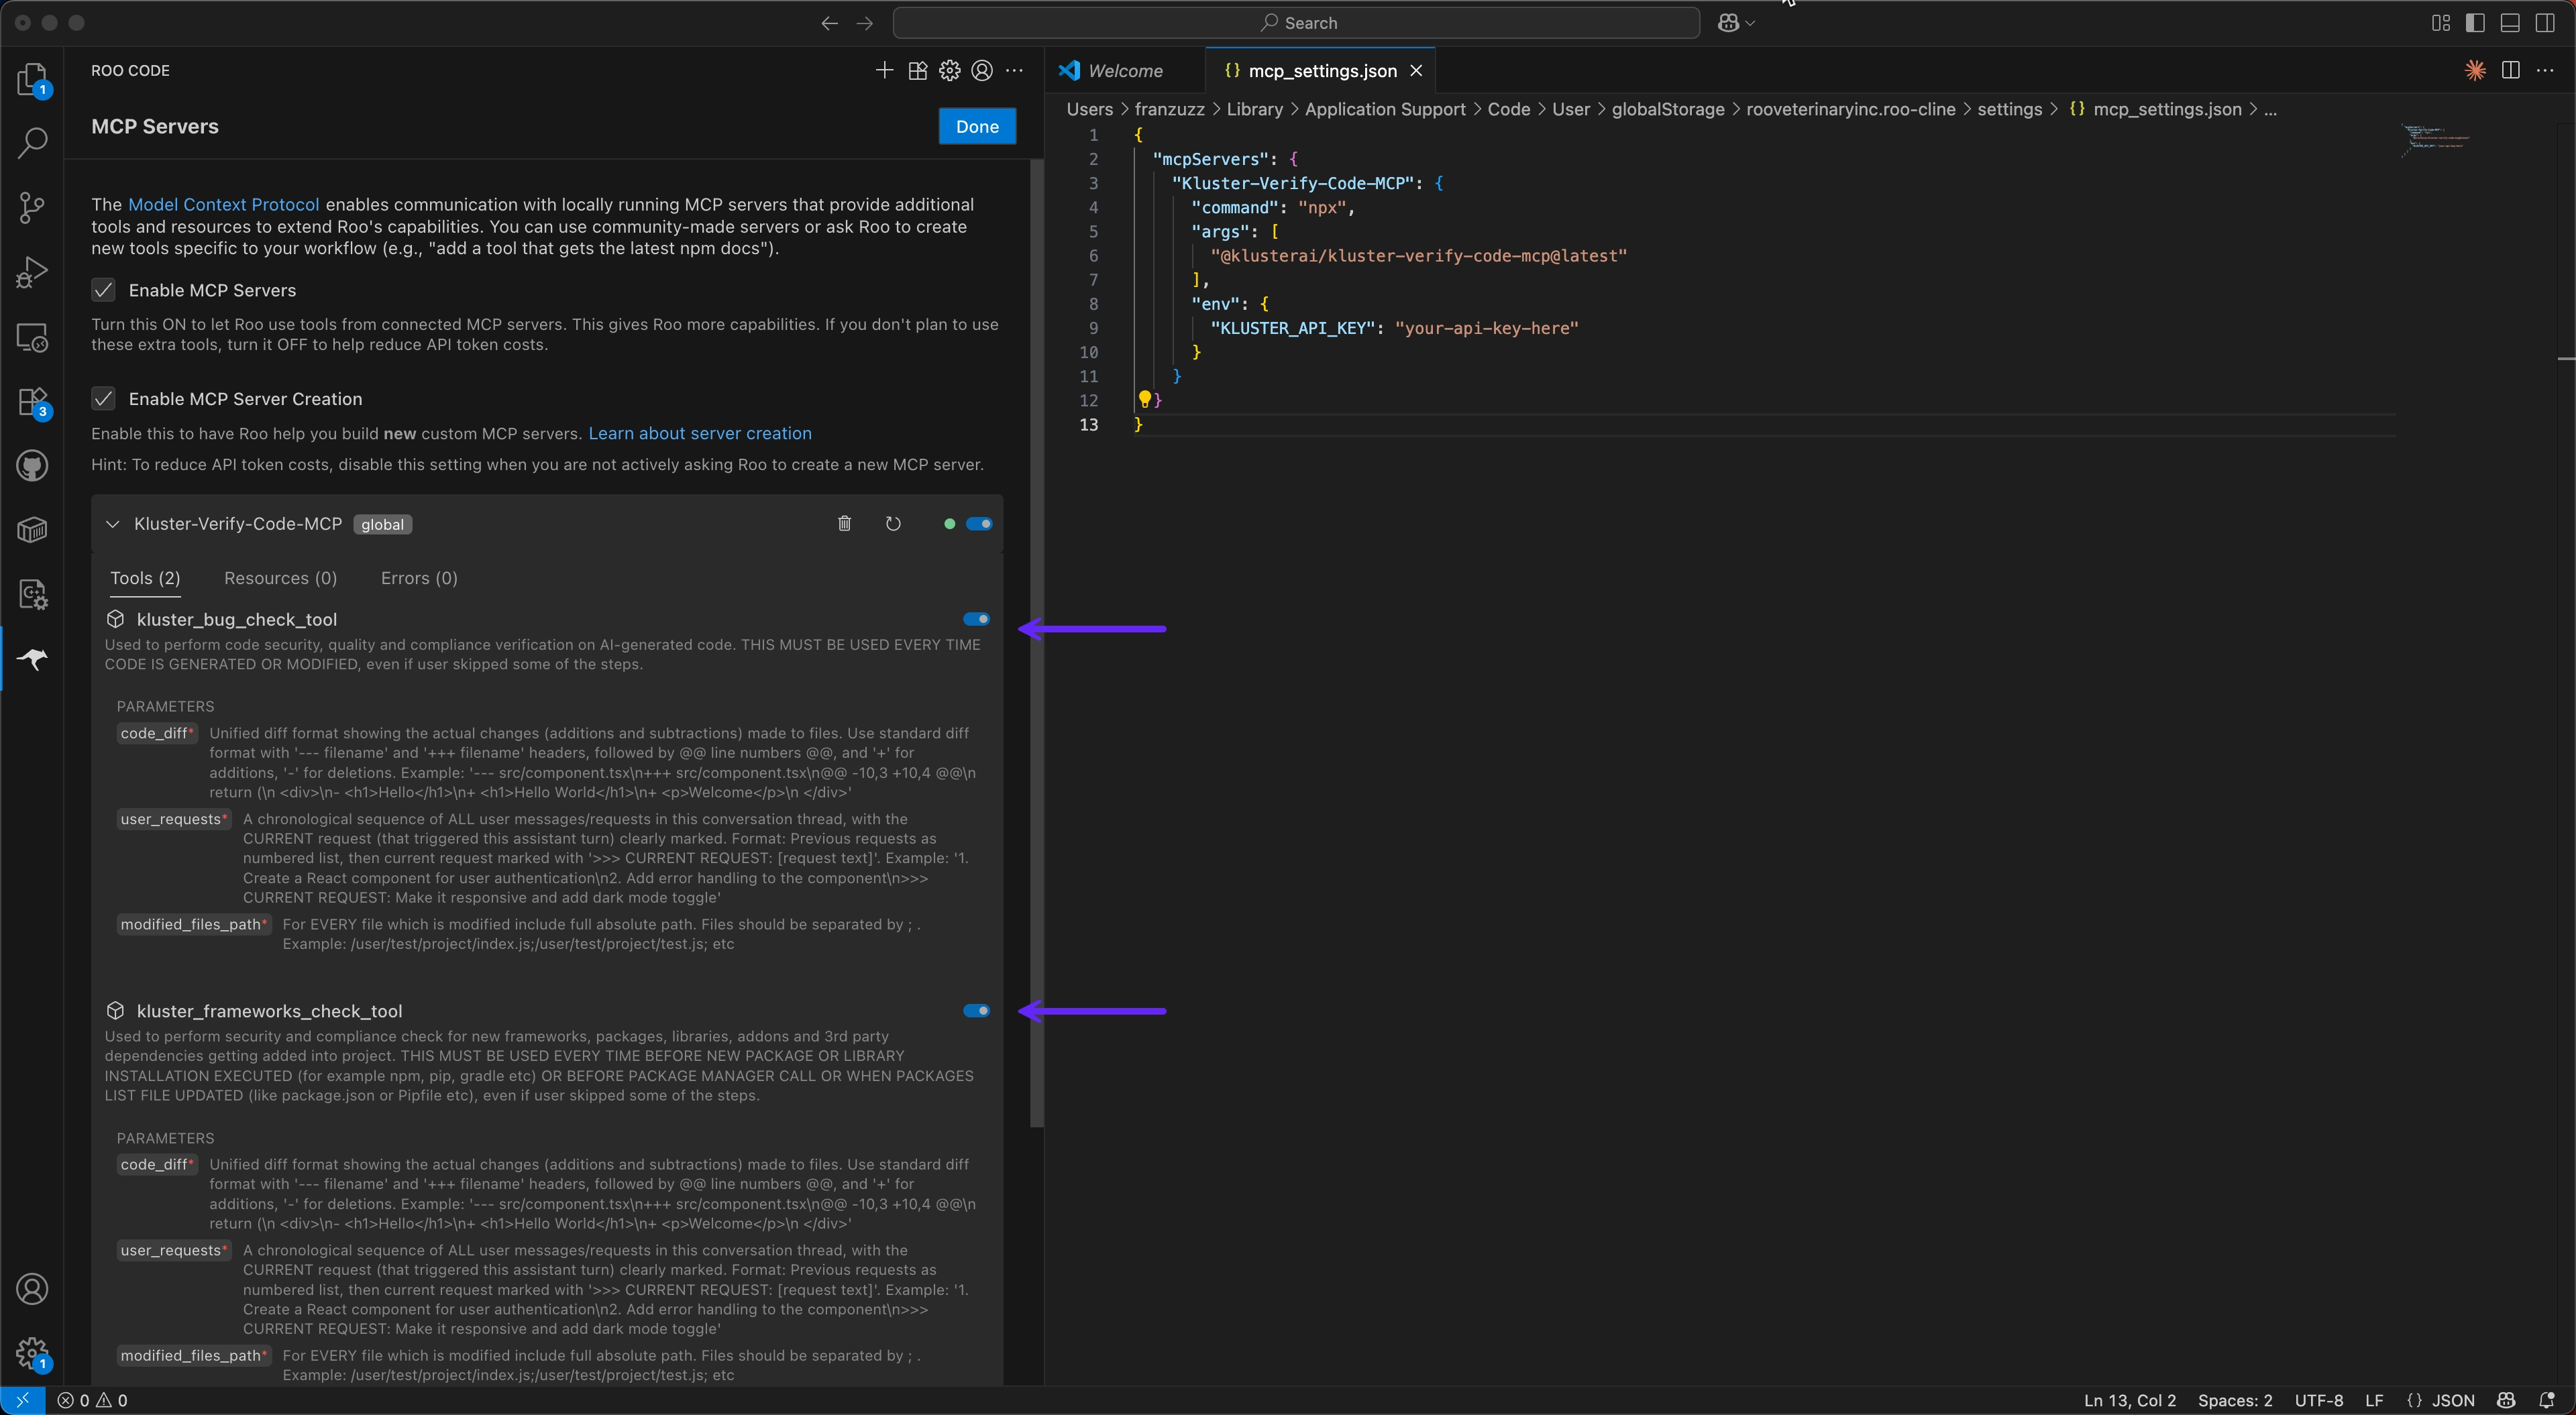
The Kluster-Verify-Code-MCP server will appear with both tools enabled:
kluster_code_review_auto: For code security and quality verification.kluster_dependency_validator: For dependency validation.
Generic MCP setup
For any other MCP-compatible IDE:
- Locate your IDE's MCP configuration file.
- Add the Kluster MCP configuration shown above.
- Replace
your-api-key-herewith your actual API key. - Save and restart your IDE if required.
The tools should now be available in your AI assistant.
Next steps#
- Learn about the tools: Understand what each tool does.
- See examples: Walk through real-world scenarios.
- Check one click installs IDEs: Explore IDEs with enhanced integration.


