Integrations#
The kluster.ai Code verification service is designed to integrate directly into your IDE workflow, providing real-time code analysis as you develop. By leveraging MCP, Code verification works seamlessly with AI coding assistants to catch issues before they reach your codebase.
For Cursor users, a one-click installation process is available that handles all setup automatically. See the Code Quick Start guide for the fastest way to get started.
Prerequisites#
Before getting started, ensure you have:
- A kluster.ai account: Sign up on the kluster.ai platform if you don't have one.
- A kluster.ai API key: After signing in, go to the API Keys section and create a new key. For detailed instructions, check out the Get an API key guide.
Supported IDEs#
Code verification works with any MCP-compatible client, including:
- Cursor: One-click installation with automatic MCP server setup (most popular).
- Windsurf: AI coding assistant with Cascade and MCP integration.
- VS Code: Manual MCP configuration via
.vscode/mcp.json. - Kilo Code: AI coding assistant with streamlined MCP configuration.
- Claude Code: Manual MCP configuration via
.claude/mcp.json. - Cline: Open-source AI coding agent for VS Code with MCP marketplace.
- Roo Code: AI-powered dev team extension with dual configuration support.
- Any MCP-compatible IDE: Manual configuration using the MCP server details below.
MCP configuration#
Add the following to your MCP configuration file:
{
    "mcpServers": {
        "Kluster-Verify-Code-MCP": {
            "command": "npx",
            "args": [
                "@klusterai/kluster-verify-code-mcp@latest"
            ],
            "env": {
                "KLUSTER_API_KEY": "your-api-key-here"
            }
        }
    }
}
Setup instructions#
One-click installation (recommended):
For the fastest setup, use our one-click installation process described in the Get started with Verify Code guide.
Manual configuration:
-
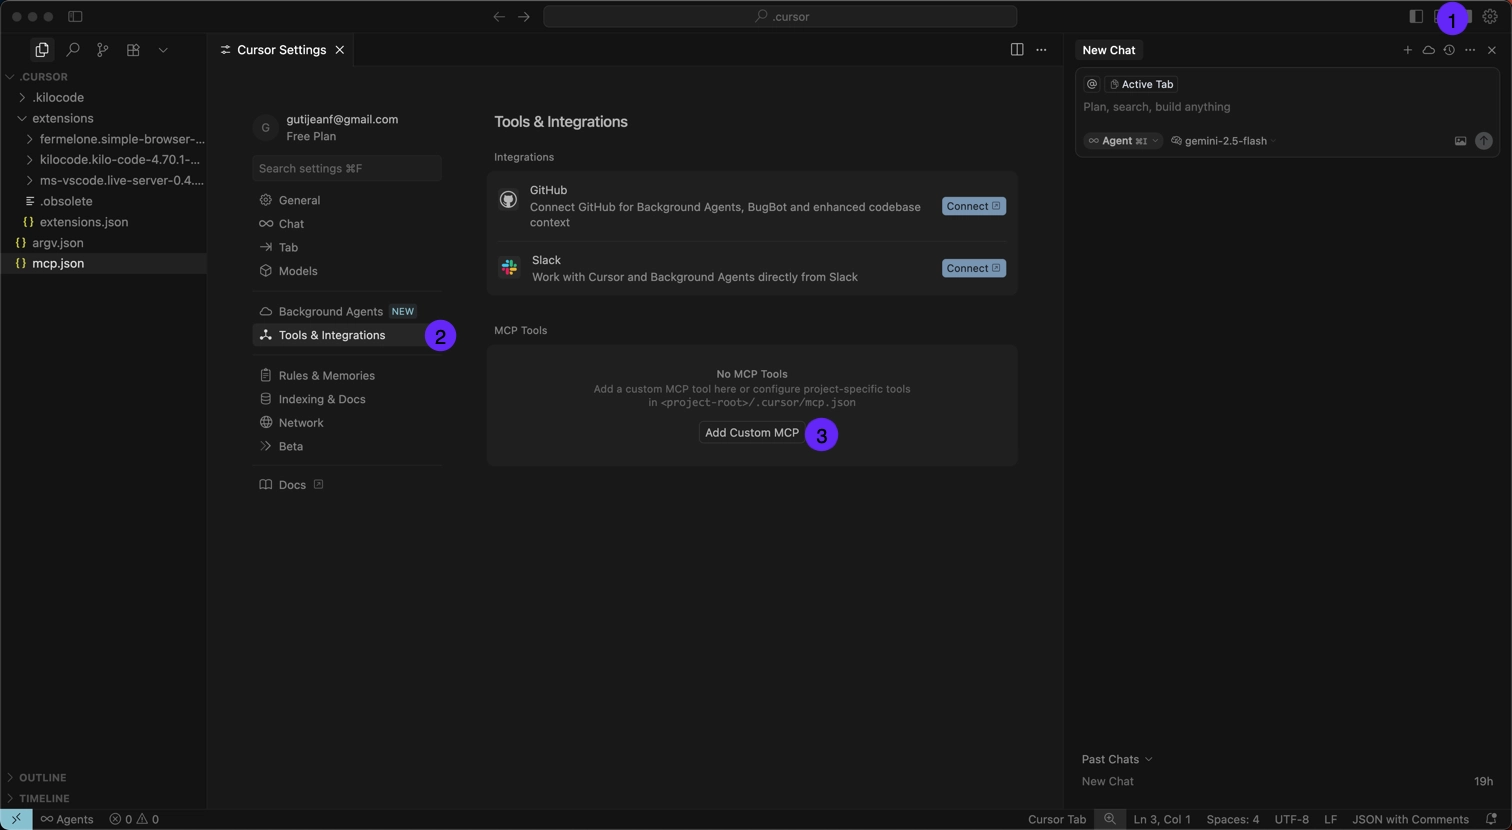
Open Cursor Settings by clicking the gear icon on the top right corner.
-
Navigate to Tools & Integrations in the left sidebar.
-
Under MCP Tools, click Add Custom MCP.
-
This opens the
mcp.jsonconfiguration file. Add theKluster-Verify-Code-MCPserver configuration: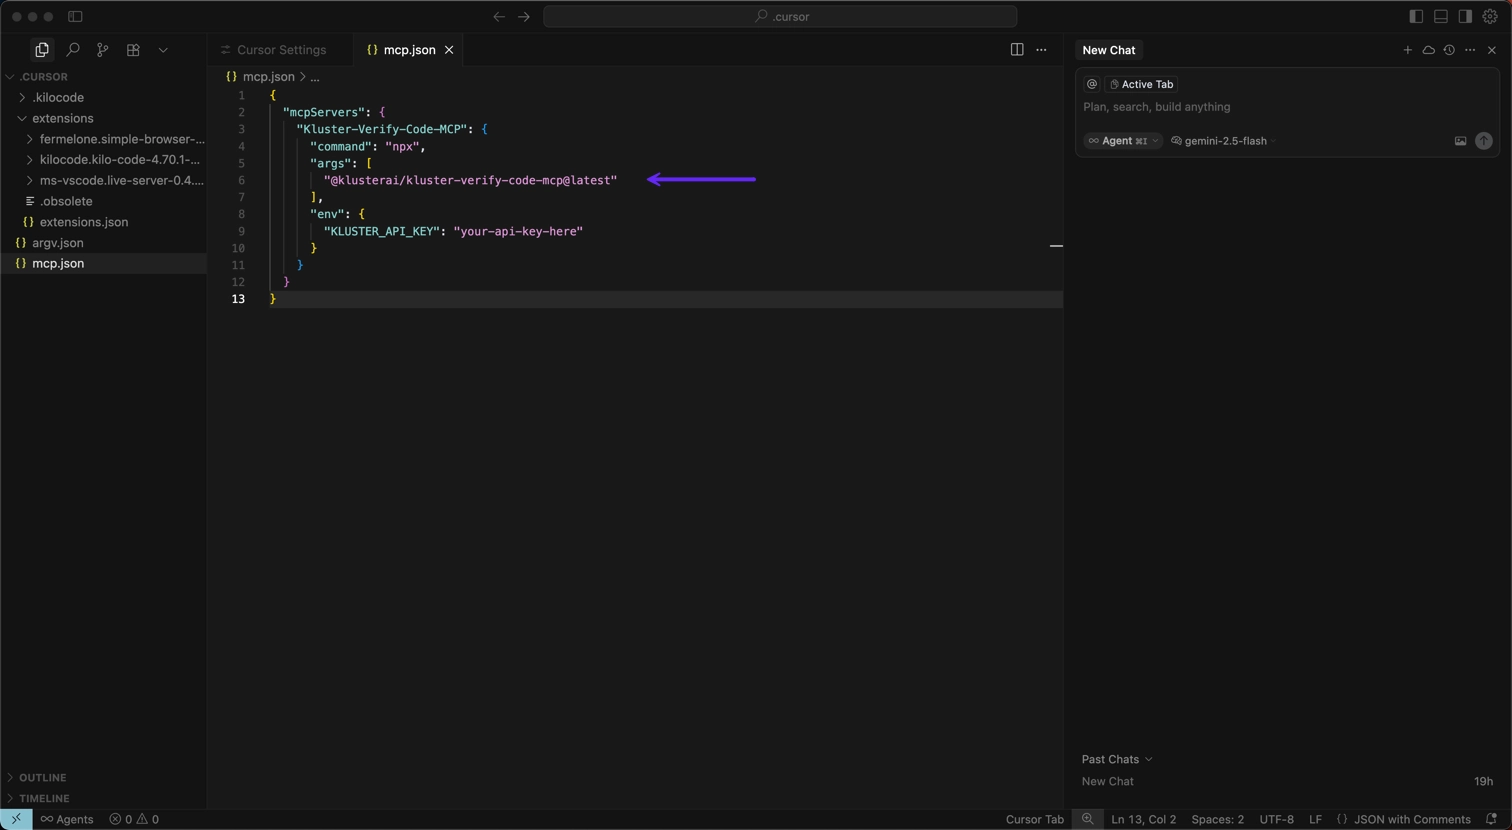
-
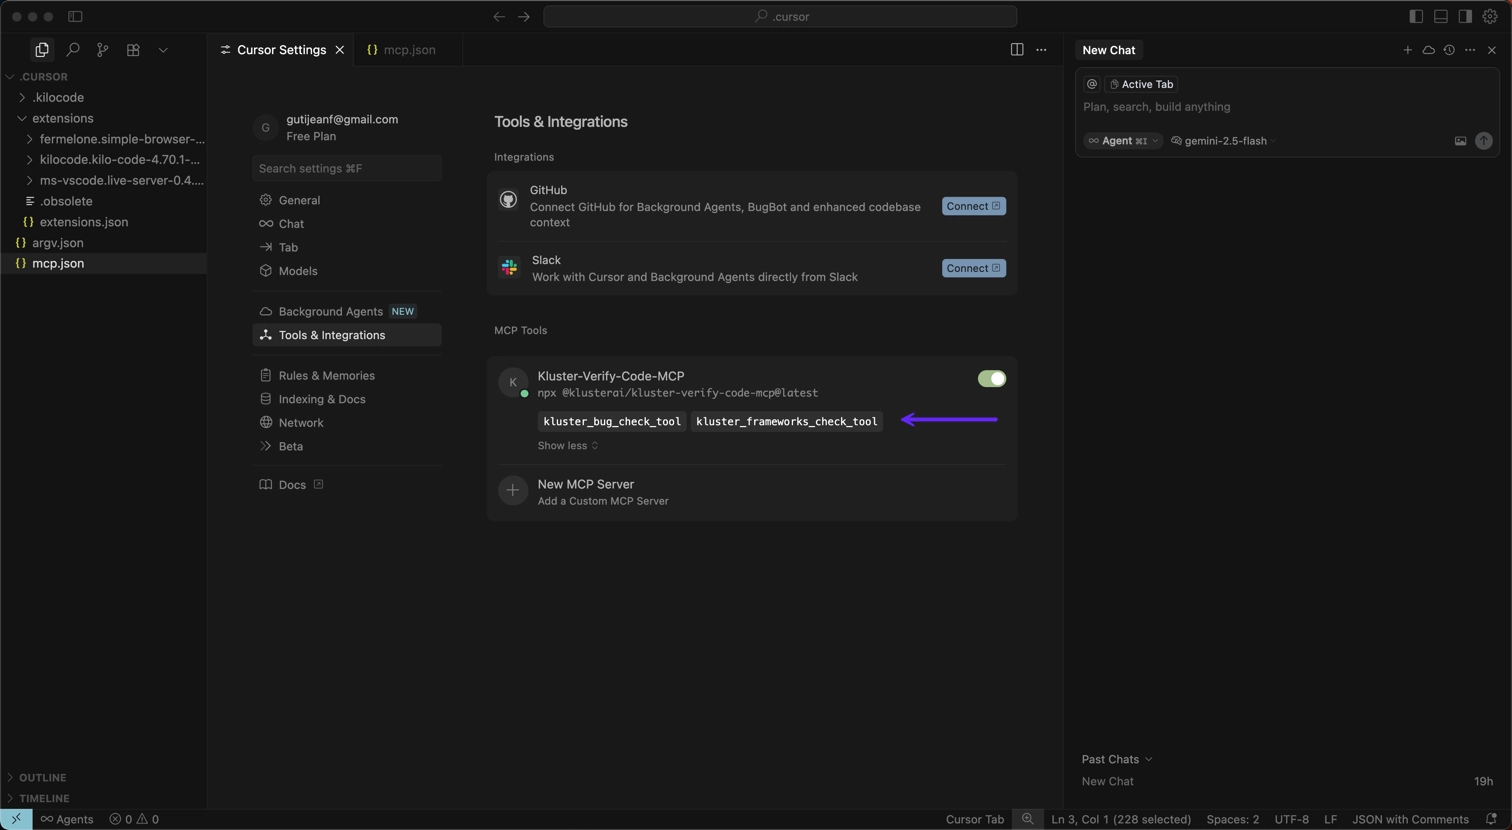
Save the configuration file and return to Cursor Settings.
The Kluster-Verify-Code-MCP server will now appear with both tools enabled:
kluster_code_review_auto: For code security and quality verification.kluster_dependency_validator: For dependency validation.
-
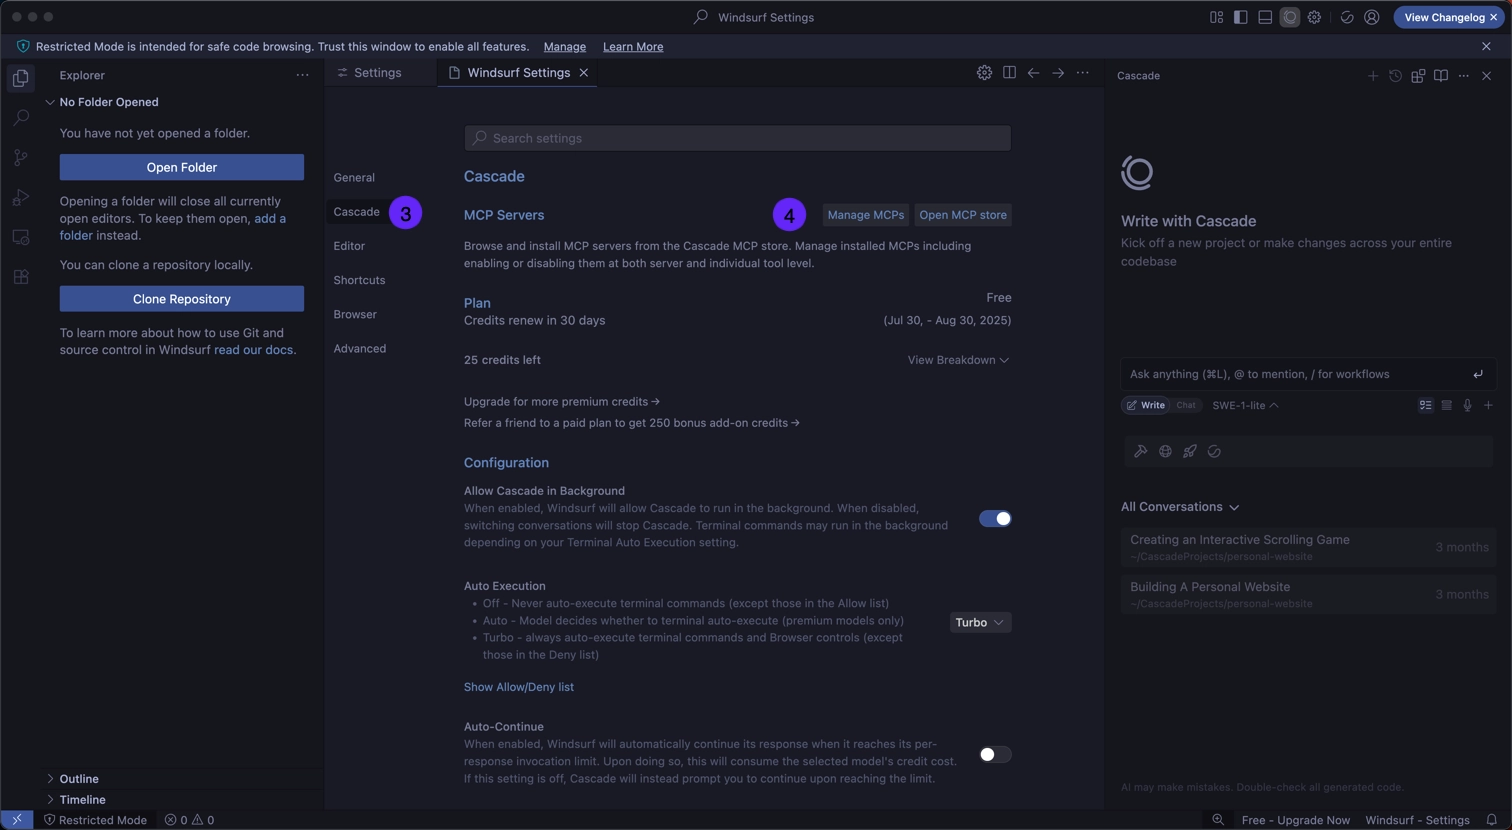
Open Settings by clicking the gear icon or using the command palette.
-
Click Windsurf Settings.
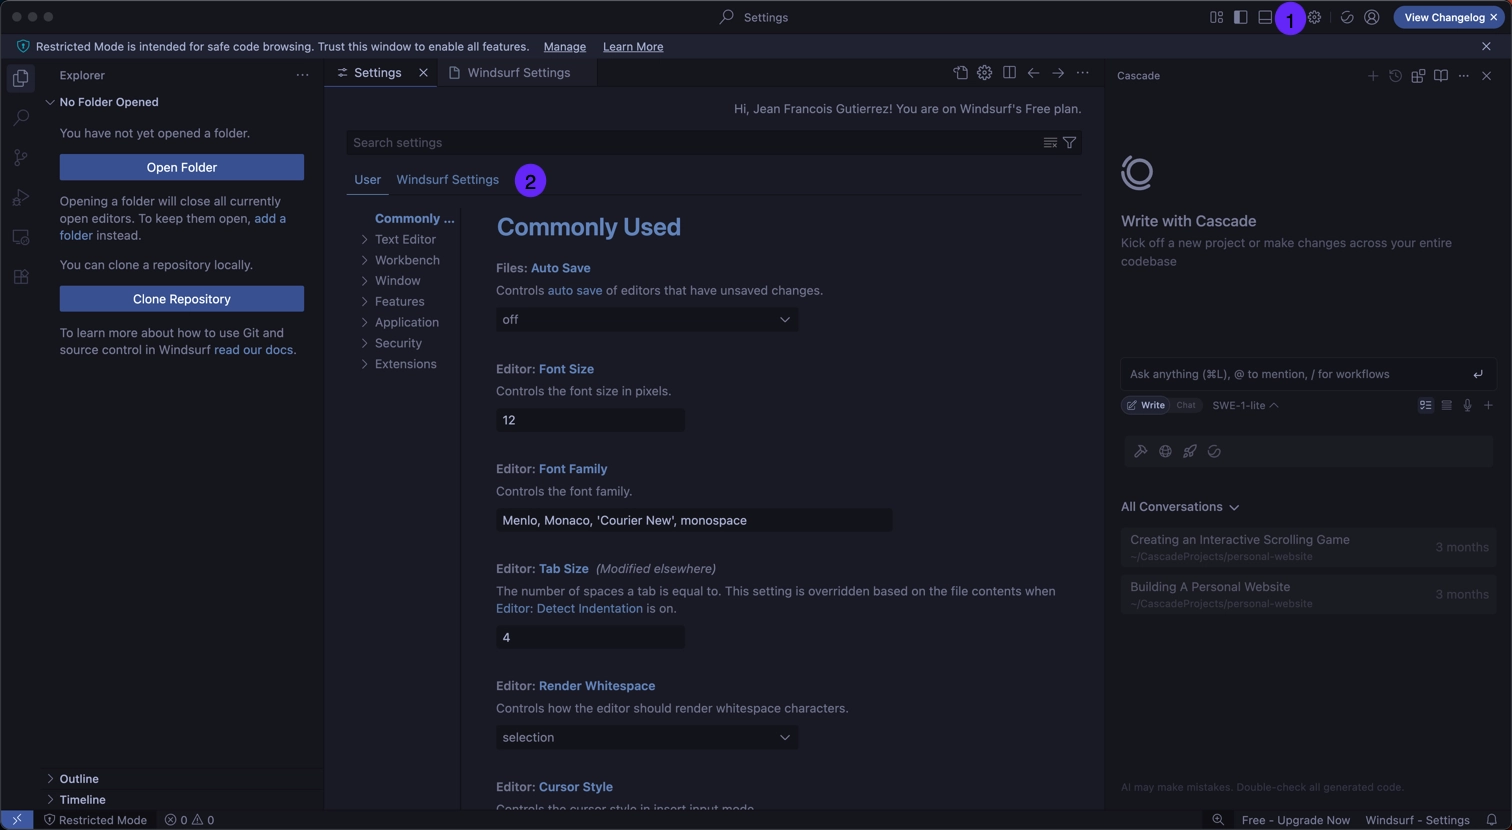
-
Navigate to Cascade in the left sidebar.
-
Select Manage MCPs to access the MCP configuration.
-
Click View raw config to access the MCP configuration file.

-
Add the
Kluster-Verify-Code-MCPconfiguration to yourmcp_config.json: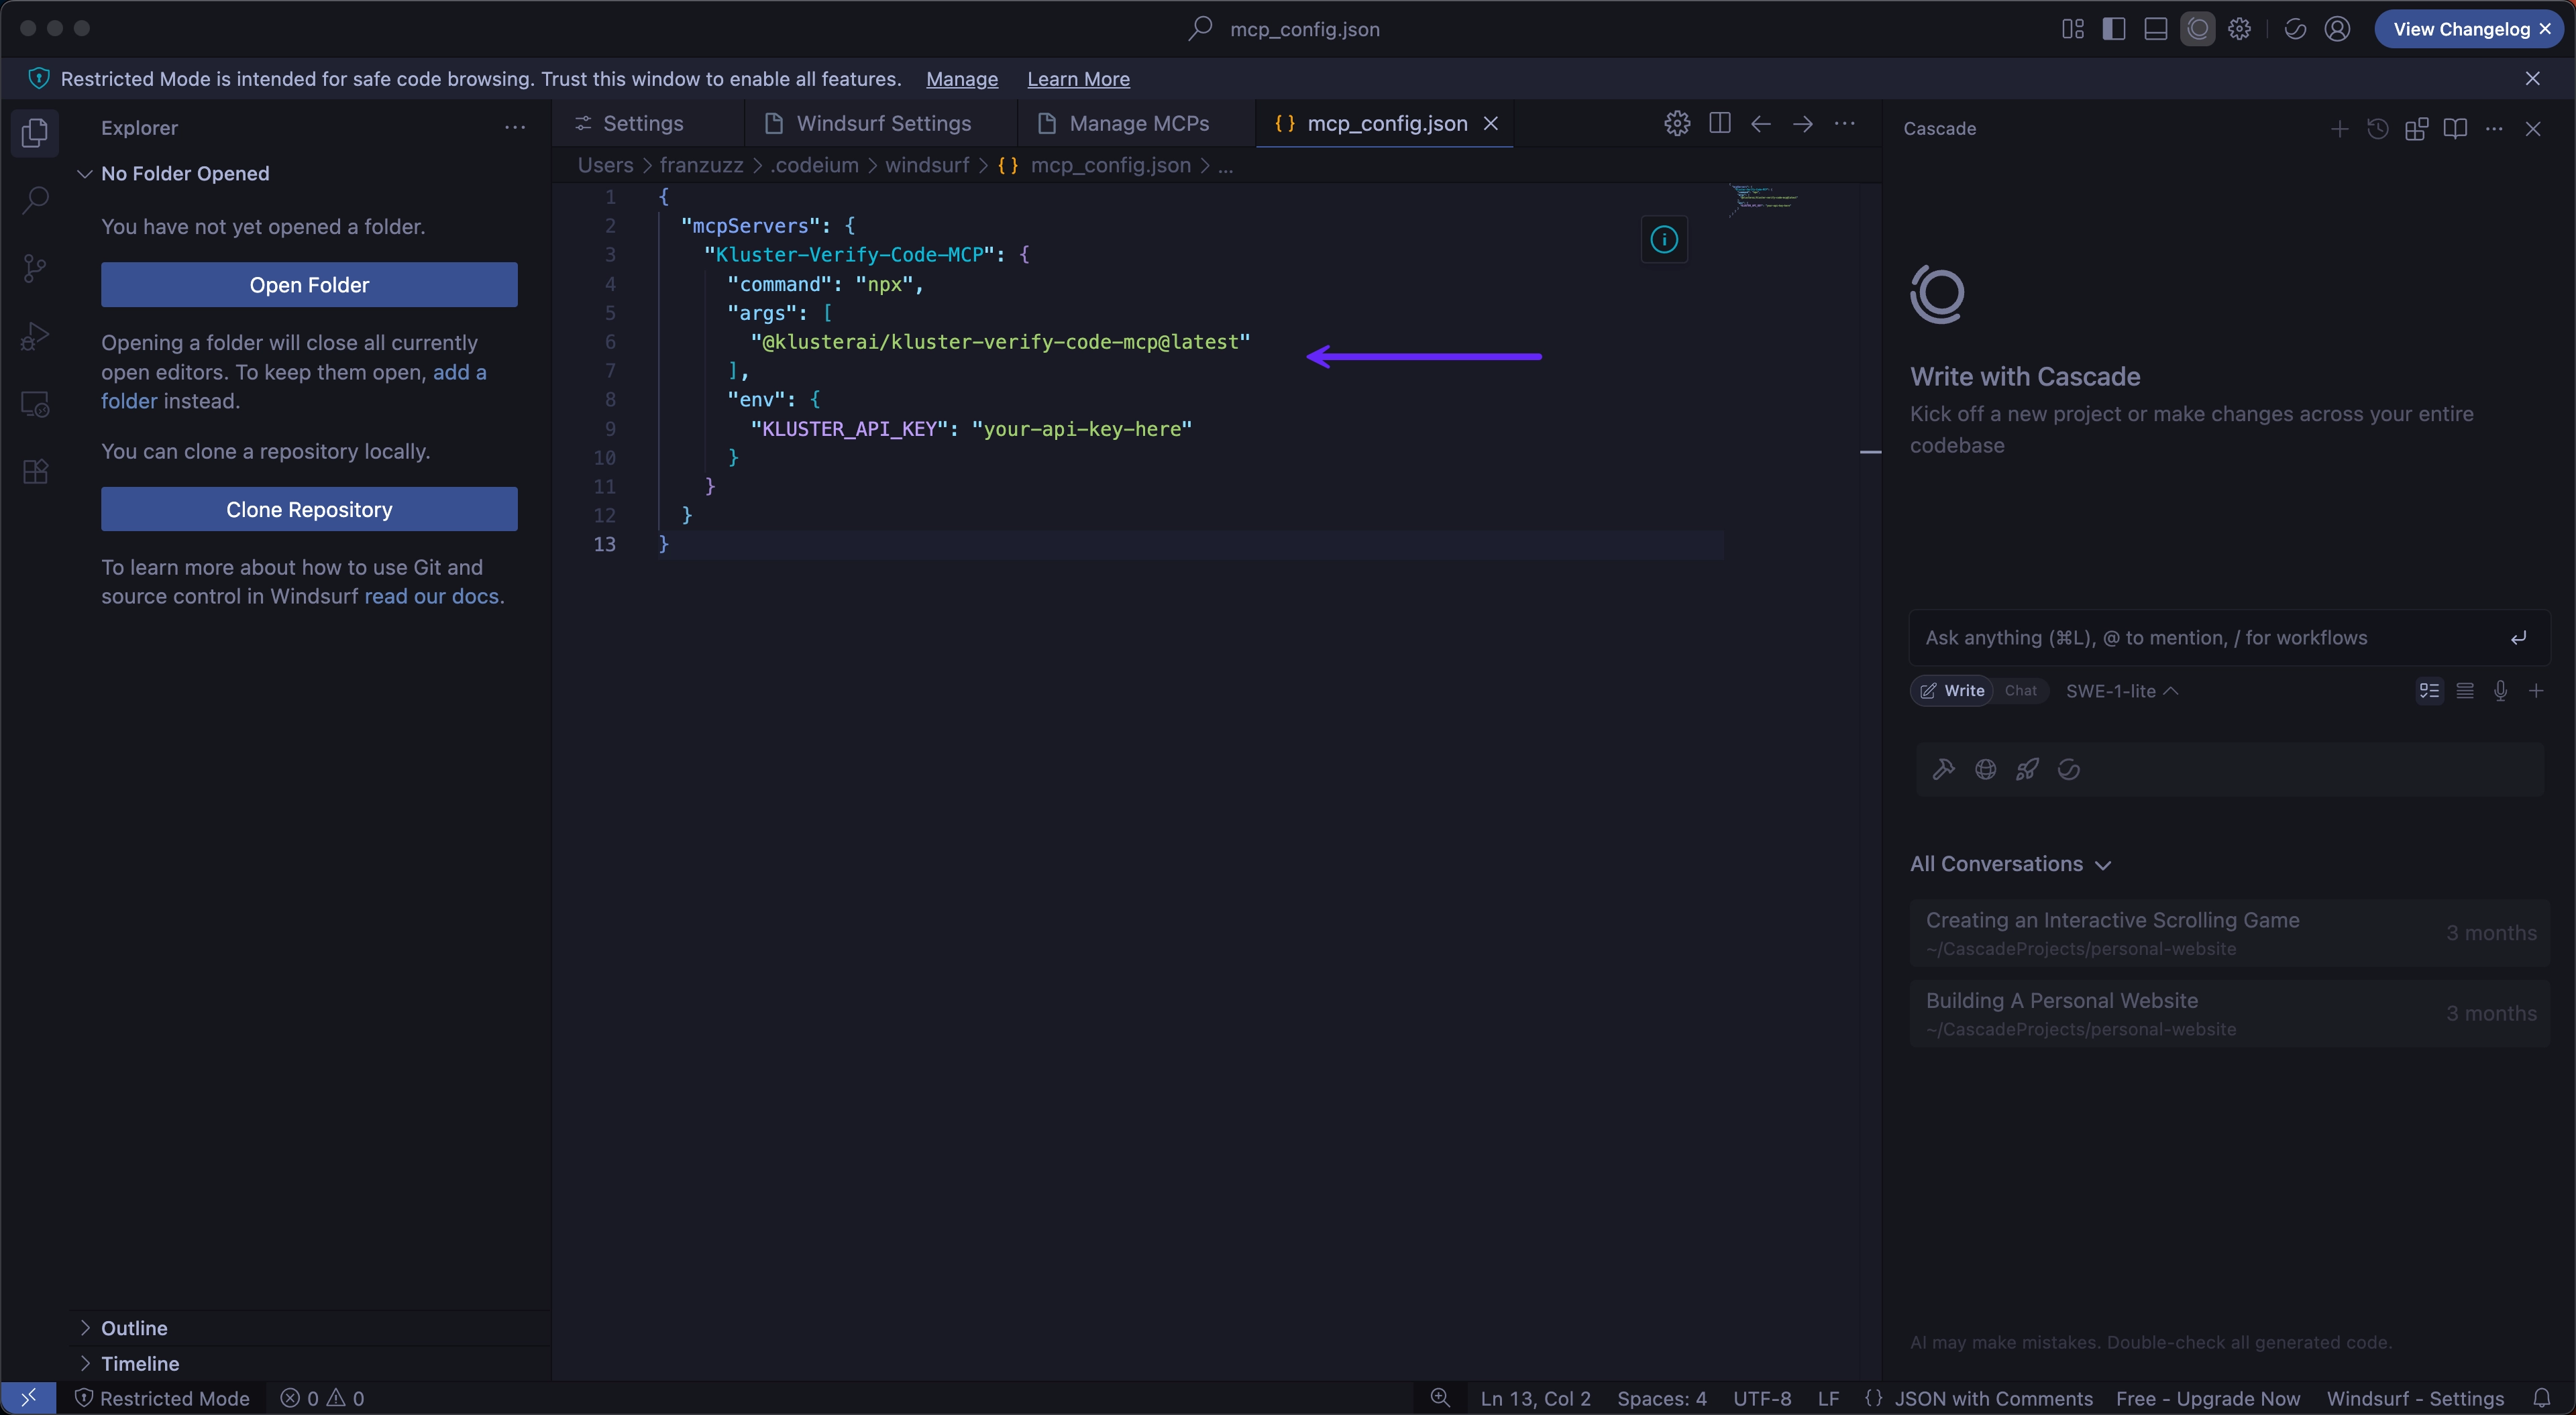
-
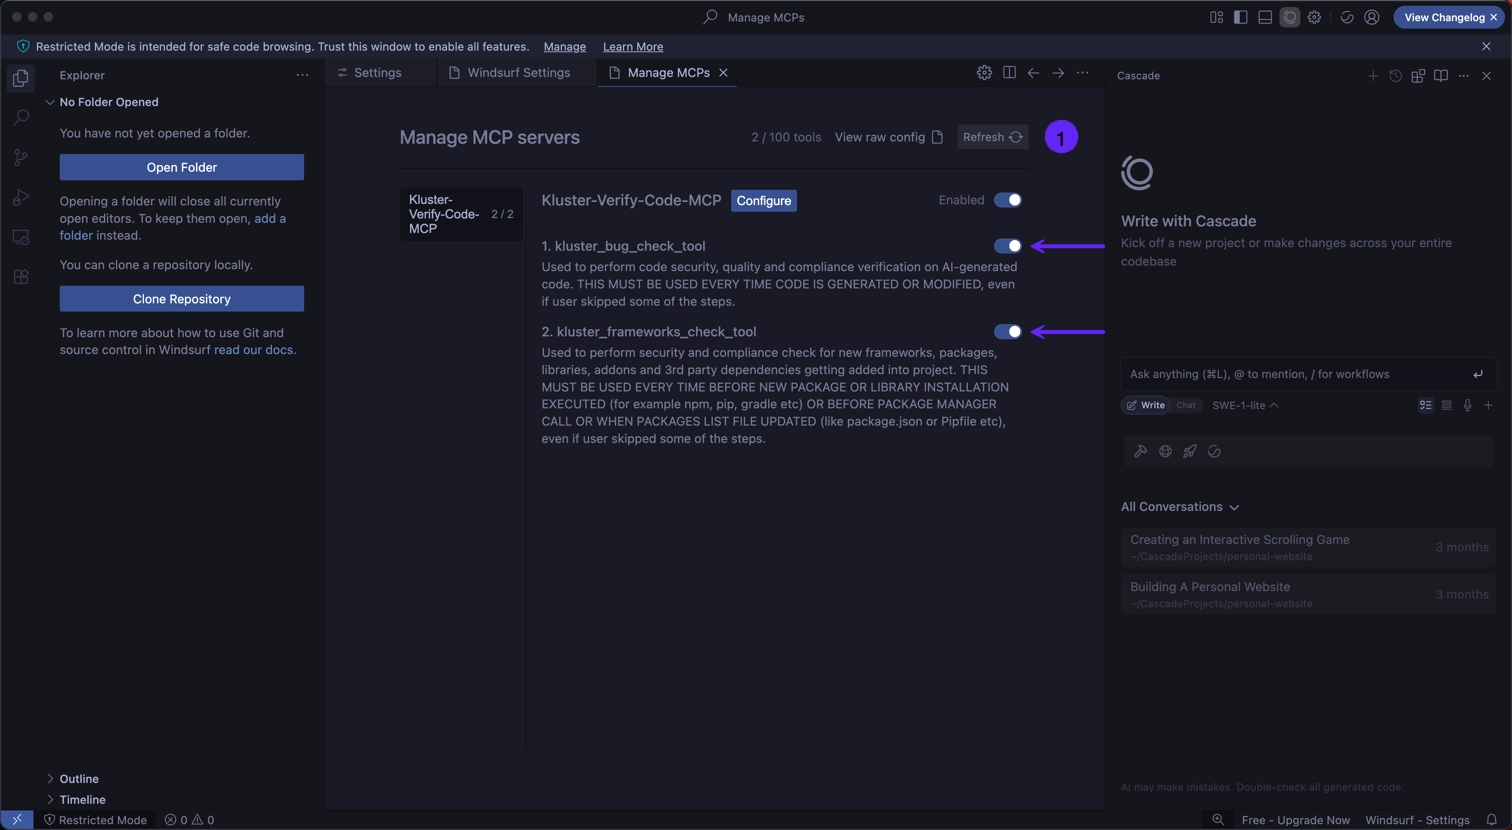
Save the configuration and refresh.
The Kluster-Verify-Code-MCP will appear with both tools enabled:
kluster_code_review_auto: For code security and quality verification.kluster_dependency_validator: For dependency validation.
-
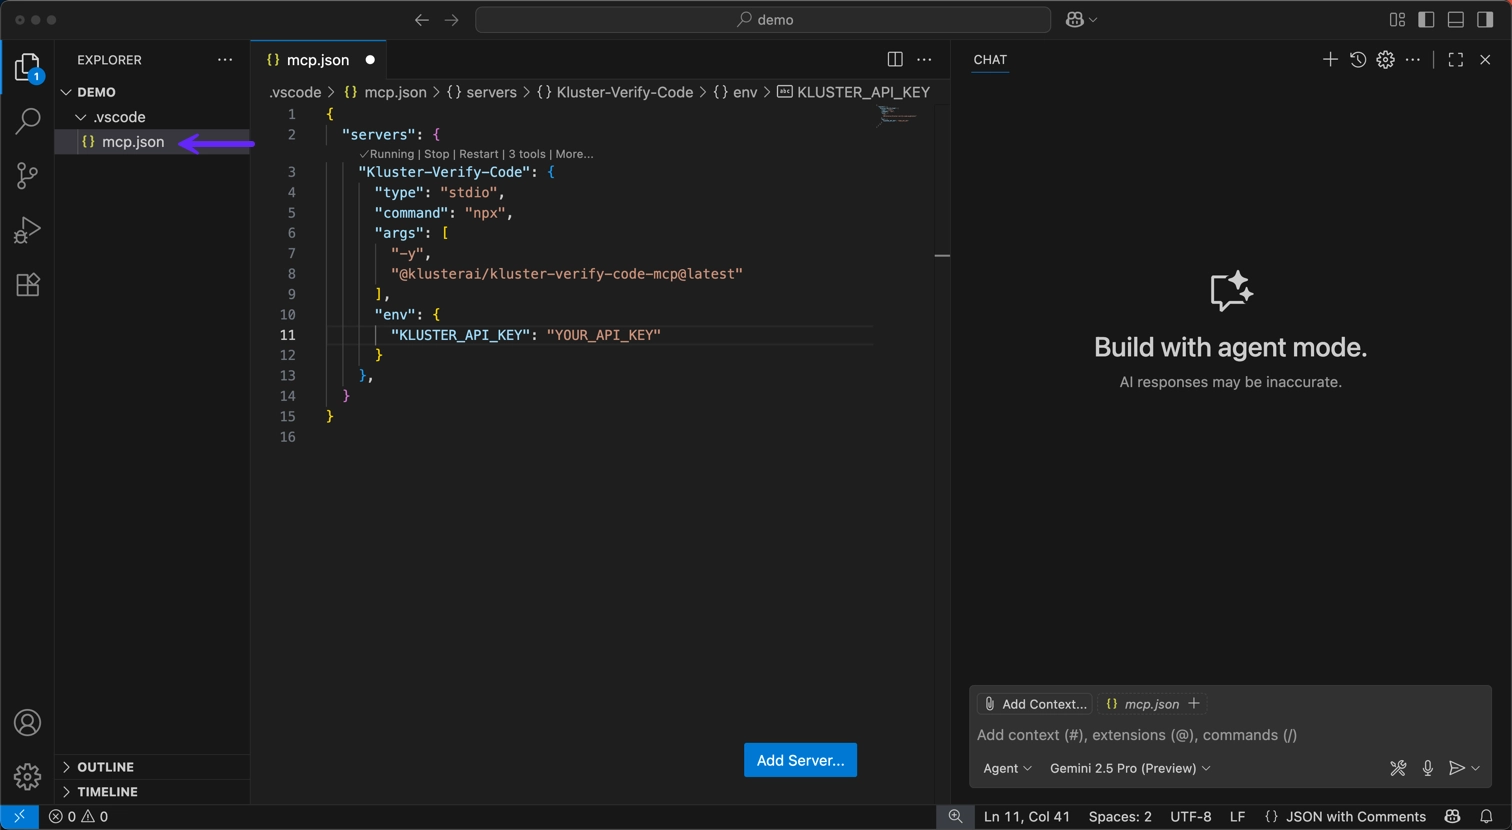
Create a
.vscodefolder in your project root if it doesn't exist. -
Create a
mcp.jsonfile inside the.vscodefolder. -
Add the following configuration:
{
  "servers": {
    "Kluster-Verify-Code": {
      "type": "stdio",
      "command": "npx",
      "args": [
        "-y",
        "@klusterai/kluster-verify-code-mcp@latest"
      ],
      "env": {
        "KLUSTER_API_KEY": "YOUR_API_KEY"
      }
    }
  }
}
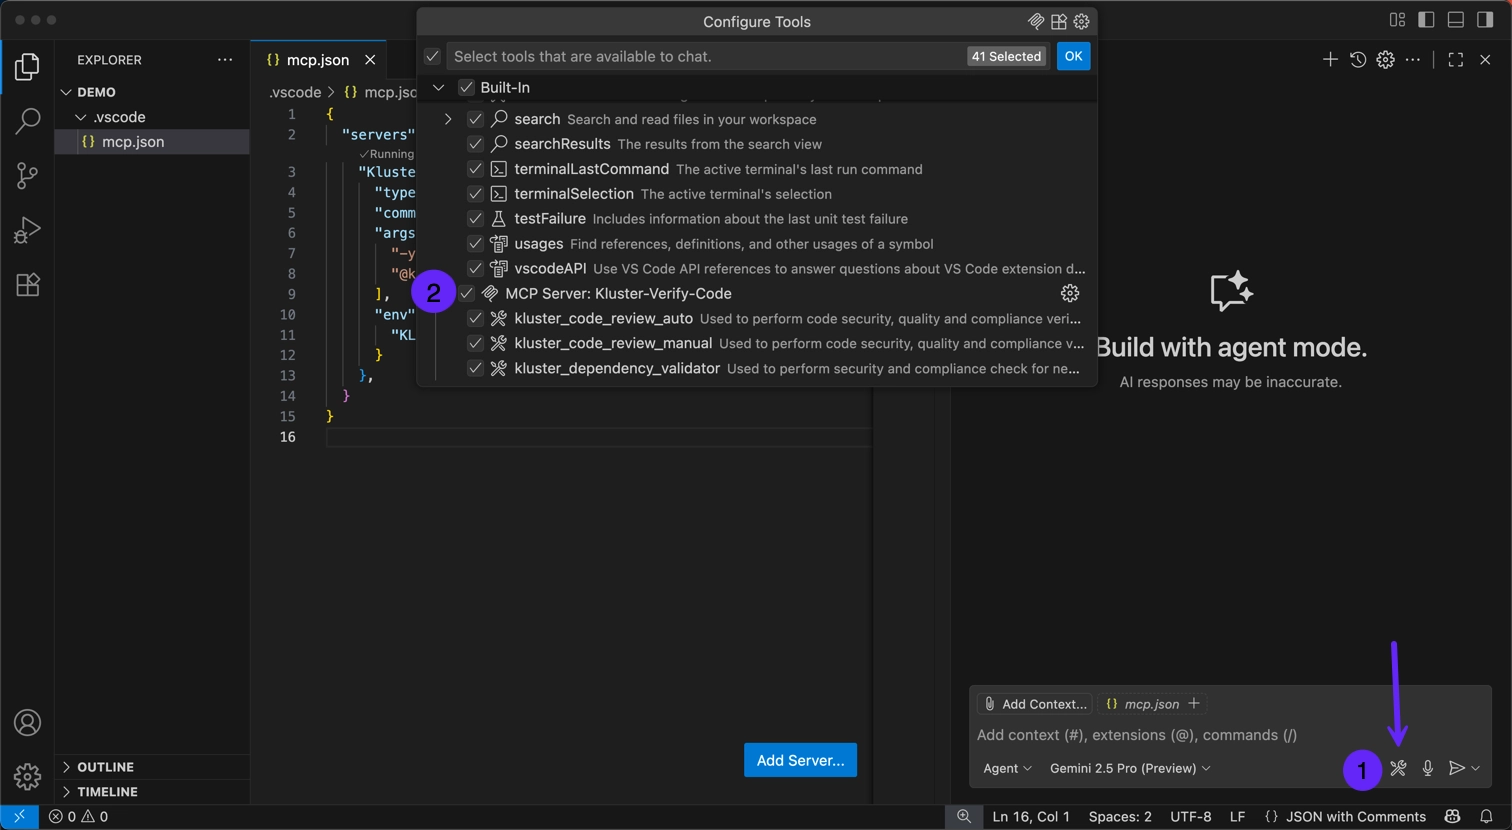
Once mcp.json is saved, to verify the successful installation of the server:
-
Click on the tools icon in the bottom right corner.
-
Select the
Kluster-Verify-CodeMCP server from the list.
The Kluster-Verify-Code MCP Server will provide both tools:
kluster_code_review_auto: For code security and quality verification.kluster_dependency_validator: For dependency validation.
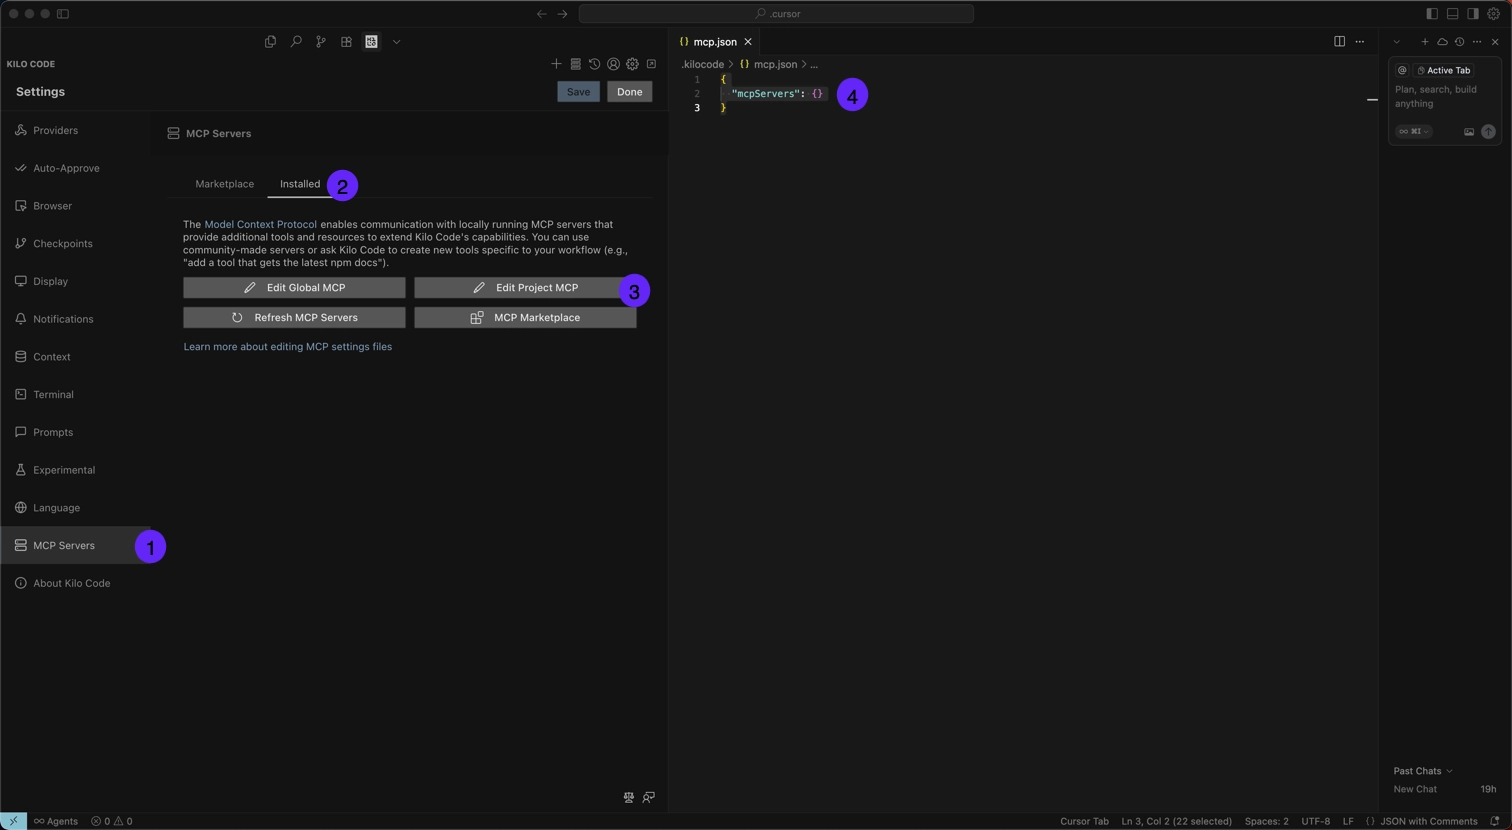
-
Open Settings and navigate to MCP Servers.
-
Select the Installed tab.
-
Click Edit Project MCP to open the MCP configuration.
-
Paste the content of the MCP config shown above with your API key.
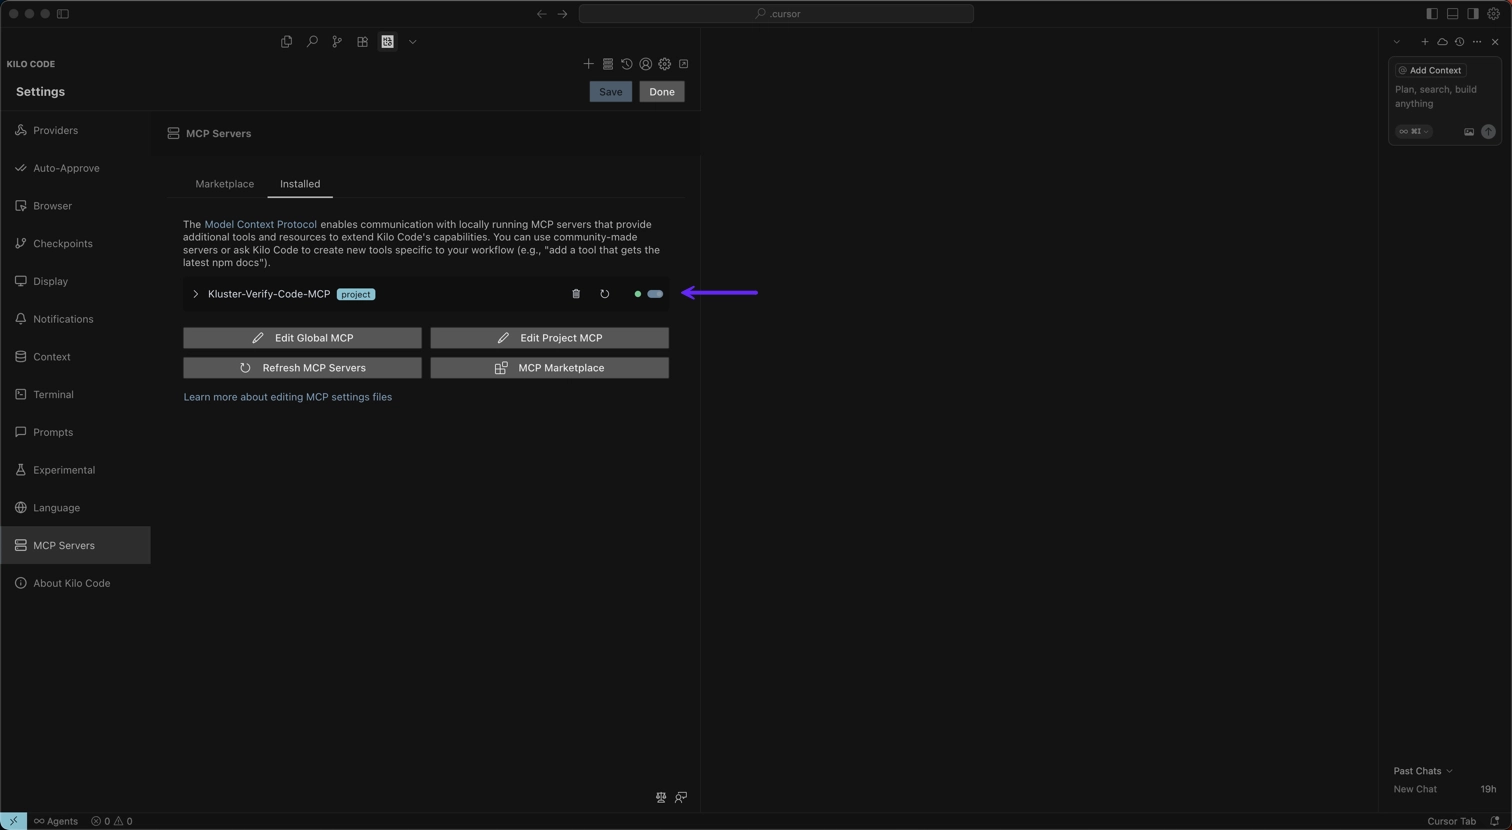
Then you should see the installed Kluster-Verify-Code-MCP server with both tools enabled:
kluster_code_review_auto: For code security and quality verification.kluster_dependency_validator: For dependency validation.
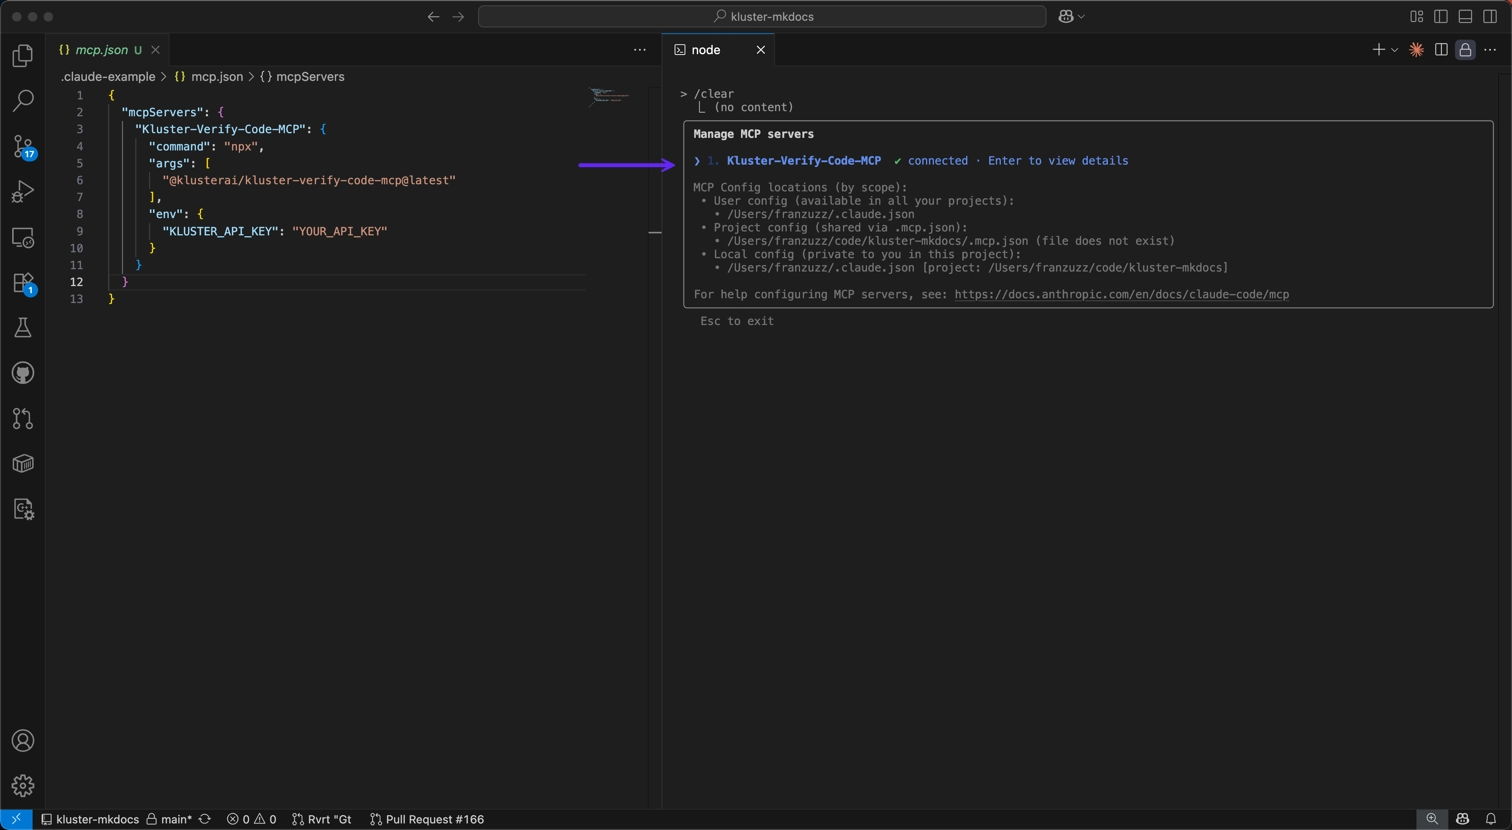
- Create or edit
.claude/mcp.jsonin your project. - Add the Code MCP server configuration shown above with your API key.
- Restart Claude Code and the tools will be available immediately.
- Run the command
/mcpto check the status of the tools.
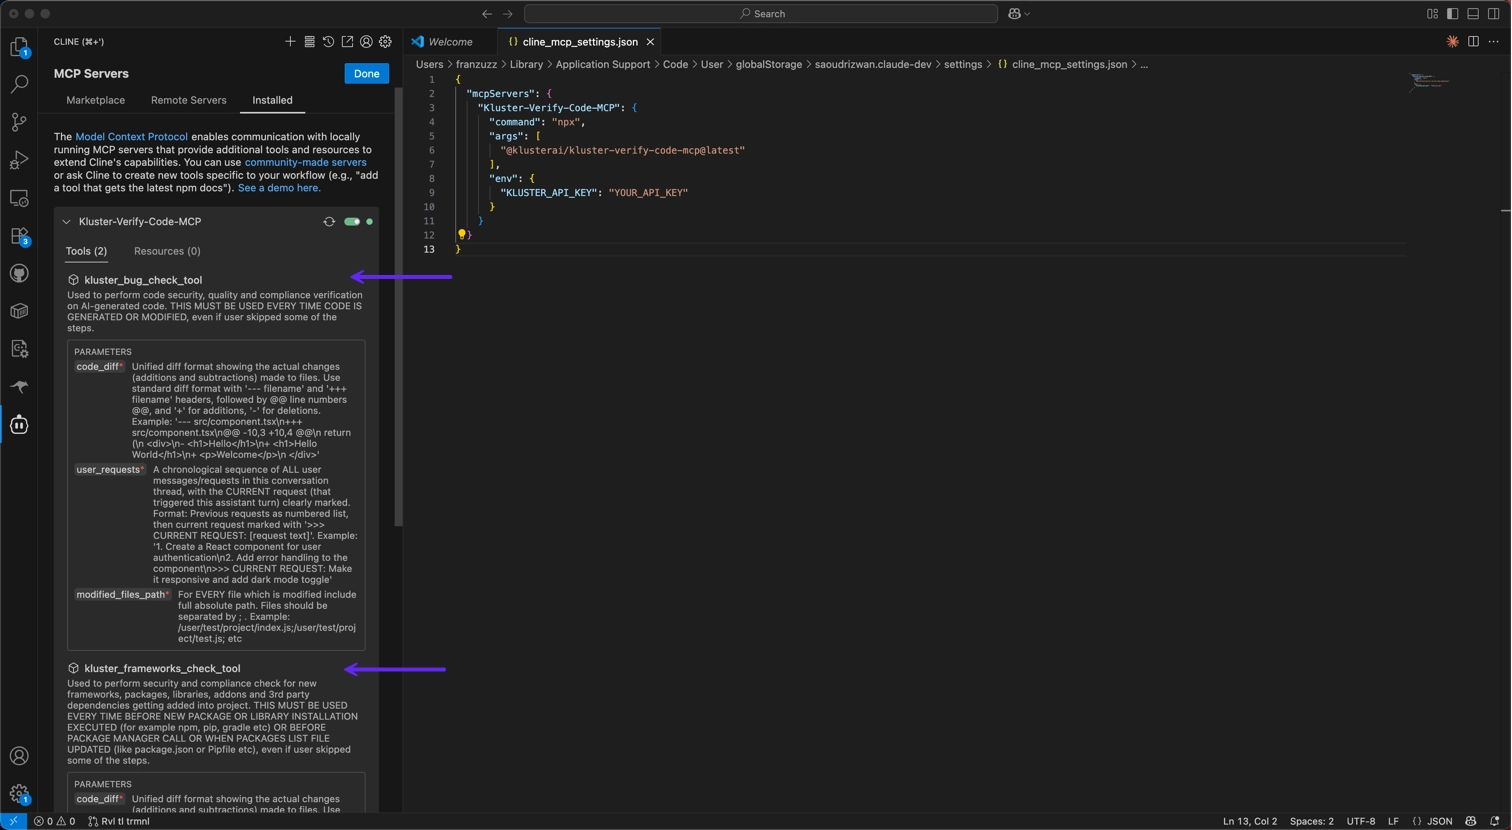
-
Open Cline and click MCP Servers in the left sidebar.
-
Select the Installed tab.
-
Click on Configure MCP Servers, which will open the
cline_mcp_settings.jsonconfiguration file. Add theKluster-Verify-Code-MCPserver configuration.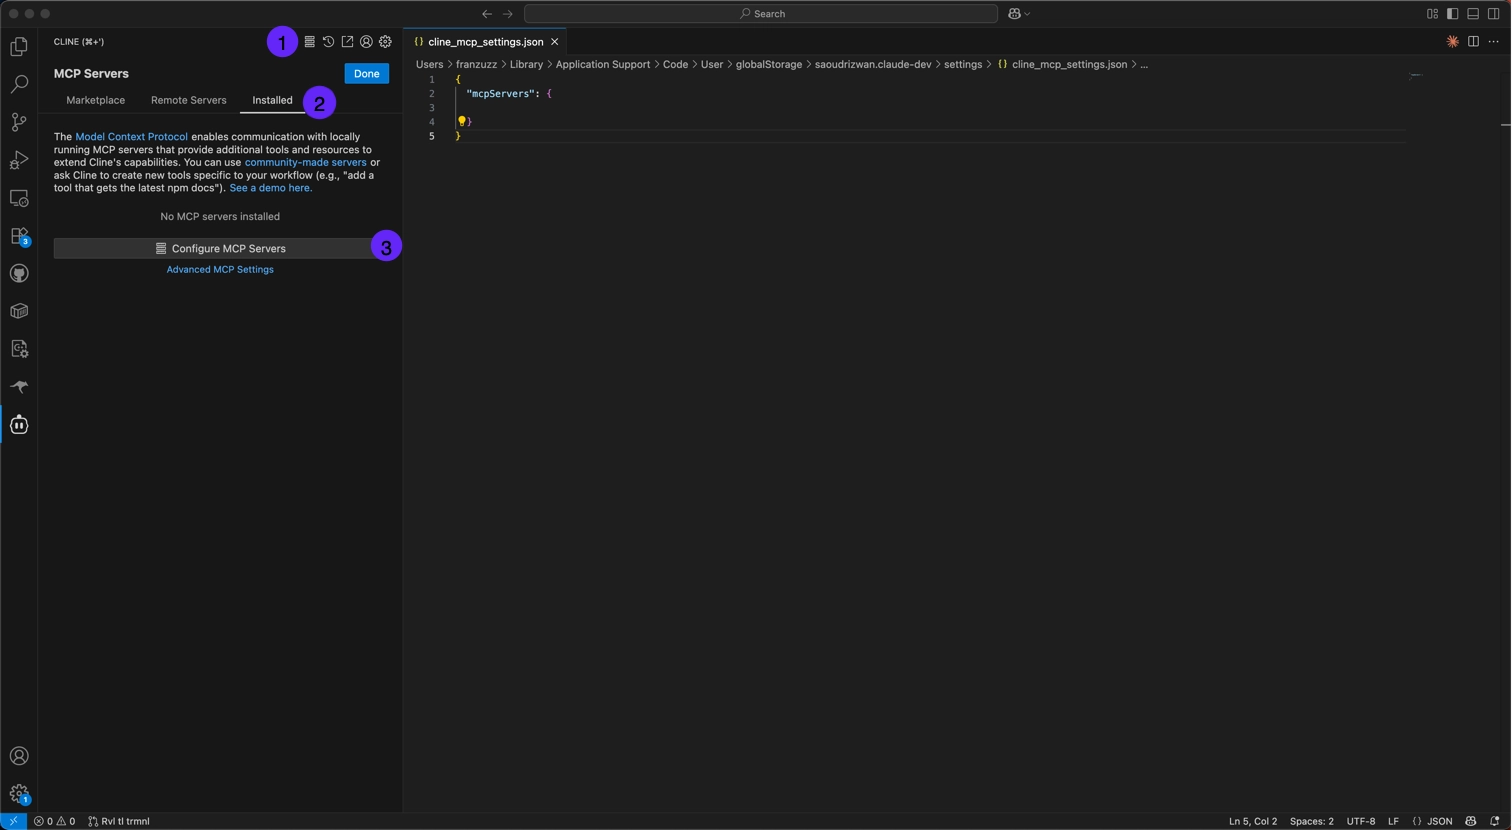
-
Save the configuration.
The Kluster-Verify-Code-MCP server will now appear with both tools enabled:
kluster_code_review_auto: For code security and quality verification.kluster_dependency_validator: For dependency validation.
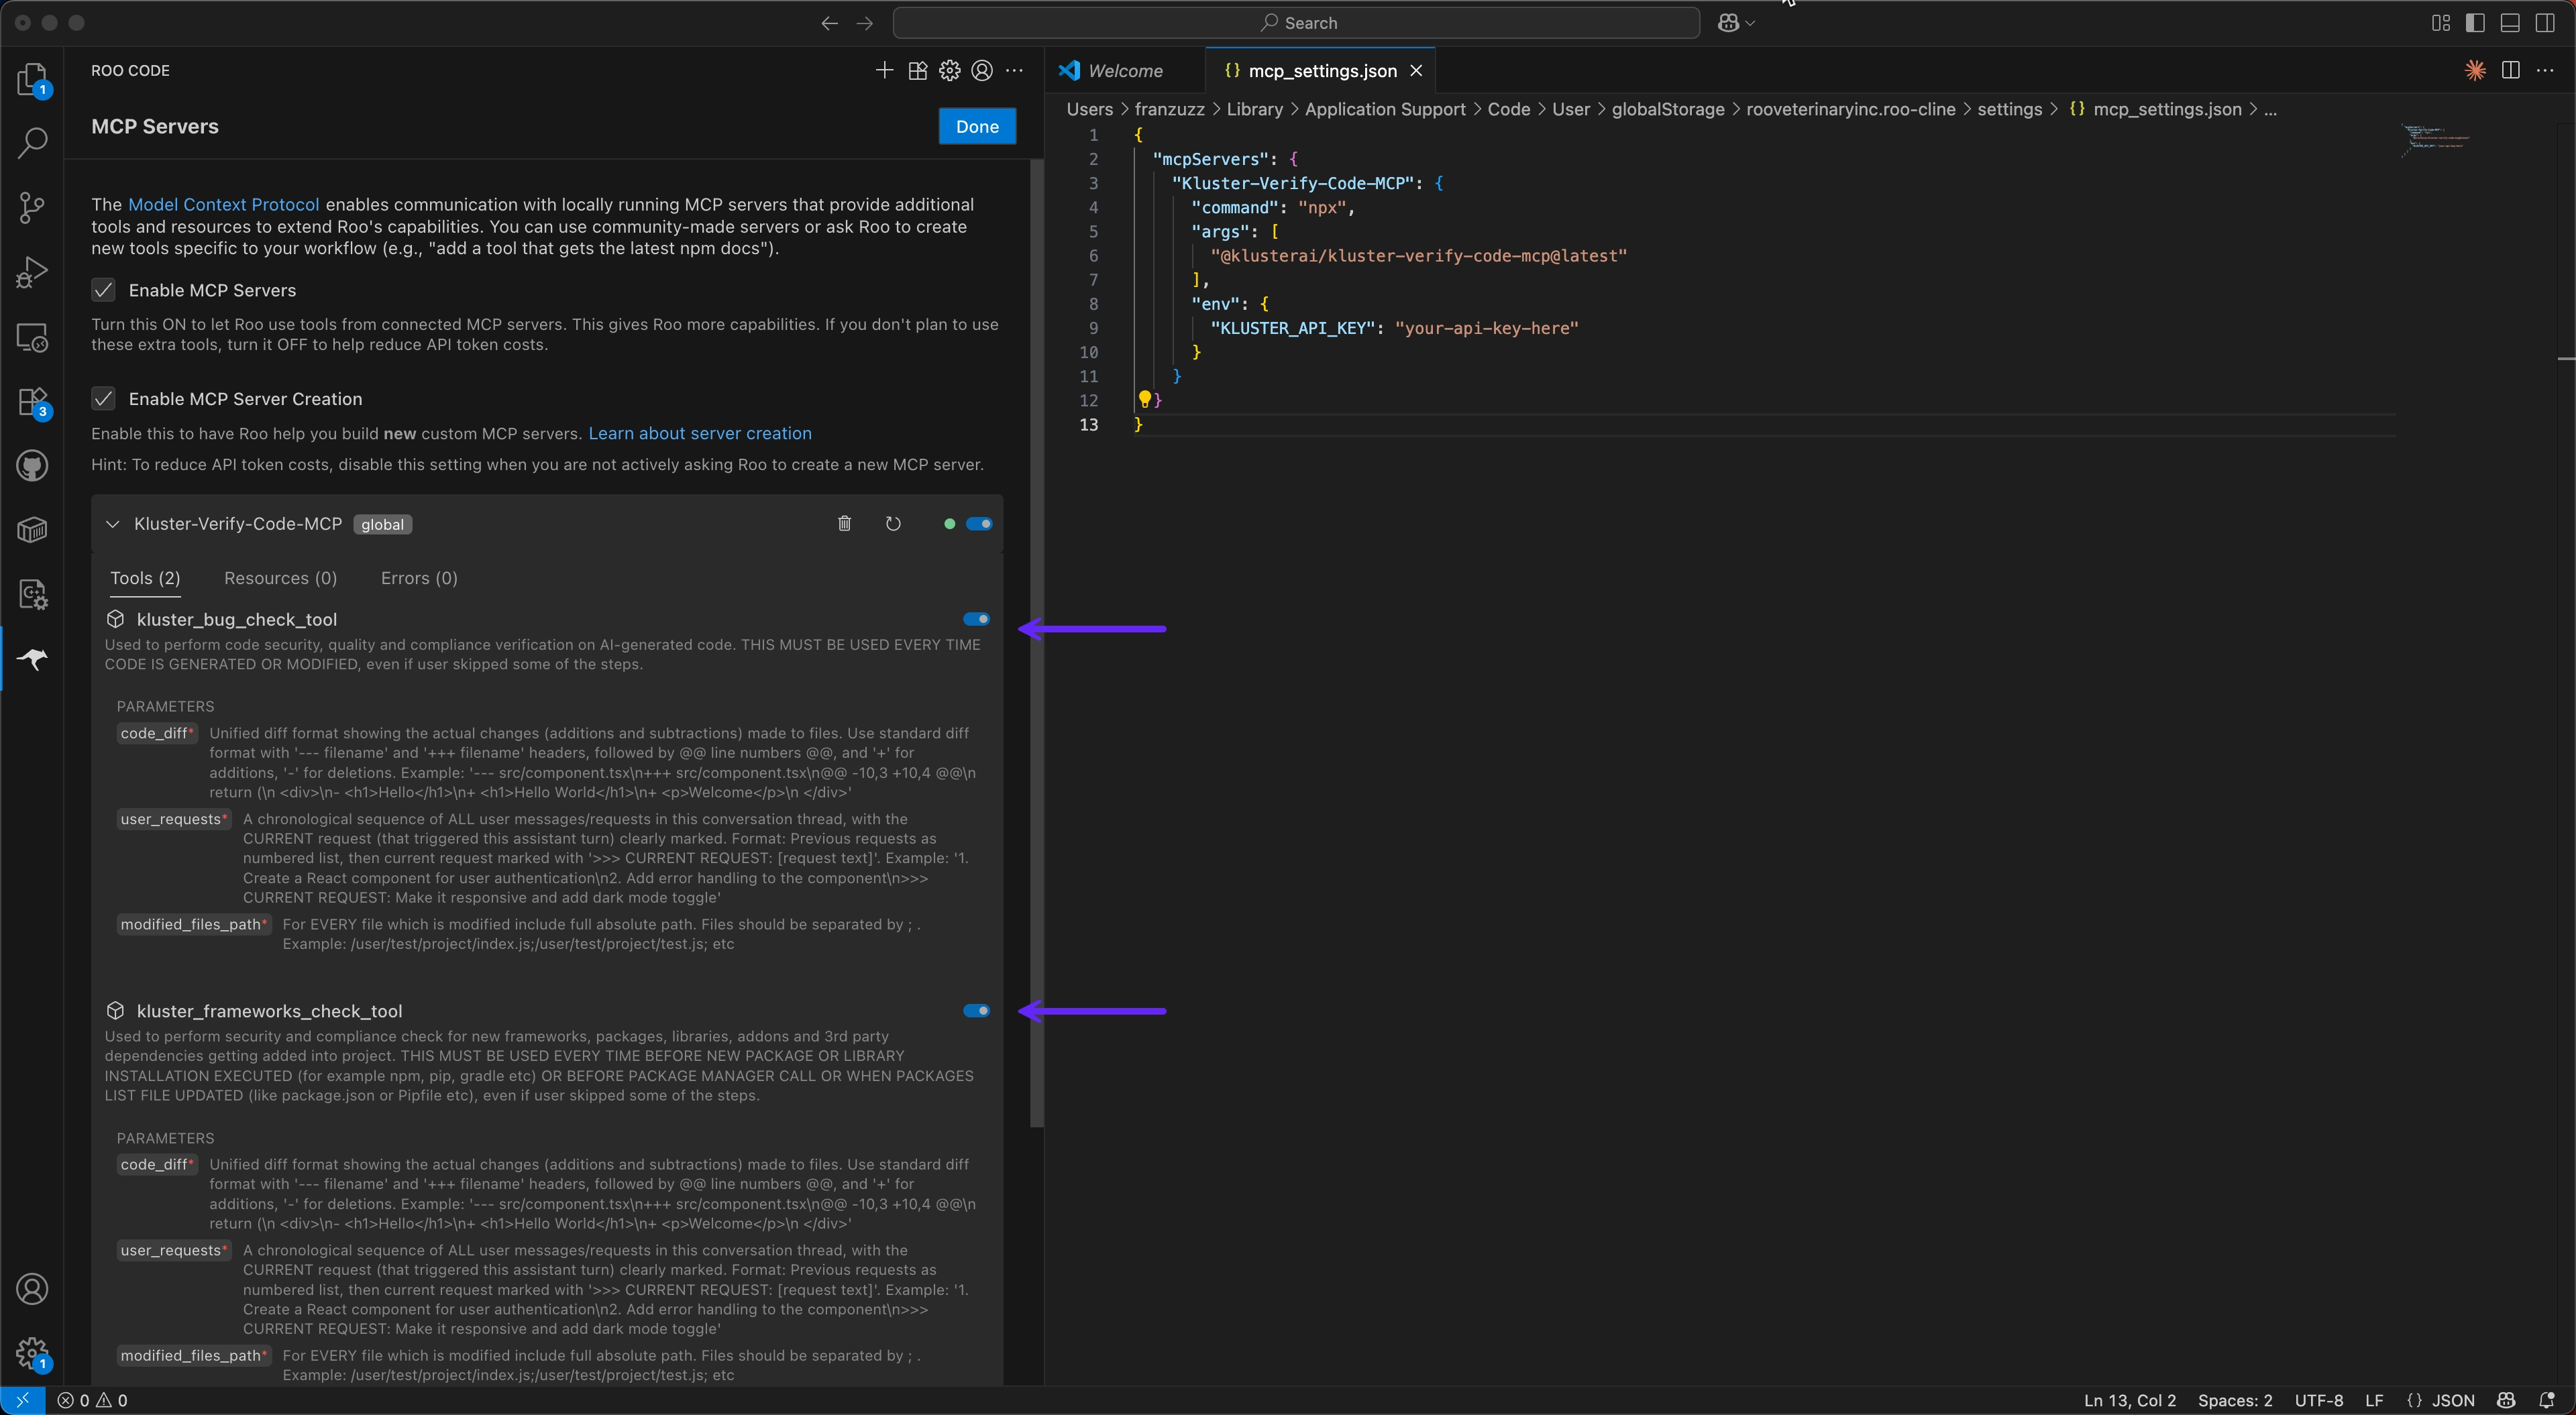
-
Open Roo Code and click on MCP Servers in the left sidebar.
-
Click Edit Project MCP to open the MCP configuration for your project.

-
The configuration file will open at
.roo/mcp_settings.json. Add theKluster-Verify-Code-MCPserver configuration shown above. -
Save the file.
The Kluster-Verify-Code-MCP server will appear with both tools enabled:
kluster_code_review_auto: For code security and quality verification.kluster_dependency_validator: For dependency validation.
For any other MCP-compatible IDE or client:
- Locate your MCP configuration file (varies by client).
- Add the Code MCP server configuration shown above.
- Restart your IDE if required by the client.
- The tools should now be available in your AI assistant.
Available tools#
For detailed information about each tool, see our Tools reference.